
Use Stitches > Fancy Fill to create artistic fills while keeping the appearance of solid stitching.

Use Stitches > Sculptured Fancy Fill to create 3D pattern effects with turning fills.
|
|
Use Stitches > Fancy Fill to create artistic fills while keeping the appearance of solid stitching. |
|
|
Use Stitches > Sculptured Fancy Fill to create 3D pattern effects with turning fills. |
Fancy Fill is a decorative fill stitch where needle penetrations form a tiled pattern. Use it to fill wide and large areas with repeating patterns while keeping the appearance of a solid field of stitching.

Sculptured Fancy Fill stitch is a variant of Fancy Fill which can be applied to objects with turning stitches. This creates three dimensional, turning pattern effects which can’t be achieved by Fancy Fill alone.
Tip The Carving Stamp feature allows you to define a pattern of needle penetrations using a ‘carving stamp’ as a template.
Select a closed object or objects.
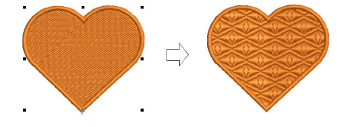
Click the Fancy Fill icon. The current Fancy Fill settings are applied to the selected object.
To change settings, double-click or right-click the object/s. The Object Properties > Fill Stitch dialog opens.
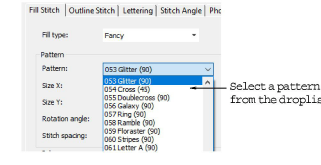
Select a pattern from the droplist.
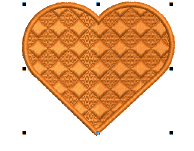
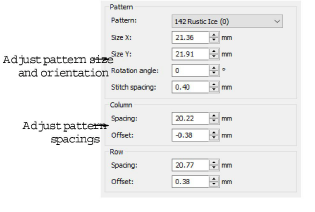
Adjust pattern size, orientation, and spacings via the object properties. The preview panel gives you immediate visual feedback.
Optionally, change pattern layout by adjusting settings via the Layout button. By default, Grid is selected. Techniques for adjusting pattern layout are the same as for pattern fills.
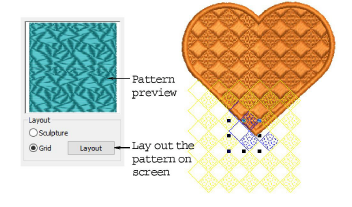
While stitch angle has no effect on pattern layout, it does affect clarity. Adjust stitch angles with the Reshape tool as necessary.
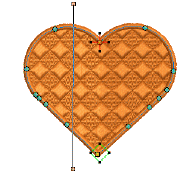
To create a turning effect, add stitch angles with the Add Stitch Angles tool or choose an object with turning angles.
Next choose Sculpture in the Layout panel. This has the same effect as choosing Sculptured Fancy Fill from the Stitch Types toolbar.
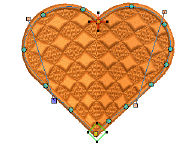
Click Apply to preview the effect or OK to finish and close.
Wave Fill lets you contour fill stitches along a digitized guideline. Wave Fill can be applied to Fancy Fill objects. However, you need to first apply the effect to a Step fill before converting to a Fancy Fill.
