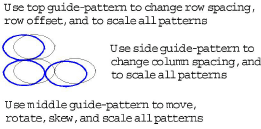
You lay out pattern fills on-screen by using ‘guide-patterns’ to scale, space, transform and offset the entire pattern fill. There are three blue guide-patterns. Other sample patterns appear in yellow. Each guide-pattern lets you change different elements of the layout. When you change a guide-pattern, all patterns in the fill change accordingly.
Tip You can also use this method to adjust the layout of Blackwork Fill, Candlewicking Fill and Lacework.
Tip Generally you define the layout of the fill before digitizing the object. If it is important to align the patterns with the object boundary, digitize the object using the current settings, and change the layout afterwards.
1Double-click or right-click a pattern fill object. The Object Properties > Fill Stitch dialog opens.
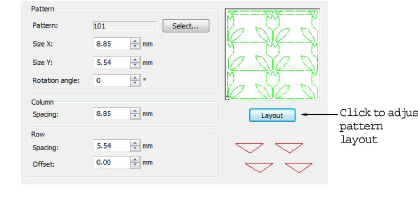
2Click Layout.
The Object Properties dialog temporarily closes allowing you to see and edit the layout guides. Yellow sample and blue guide-patterns appear in the workspace. When you change a guide-pattern, all patterns in the fill change accordingly.
Zoom in to select the correct guide-pattern.
3Adjust the guide-patterns to achieve the effect you require.
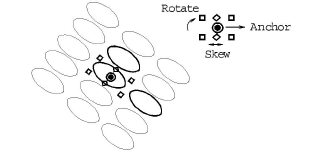
Move patterns by selecting the middle guide-pattern and dragging it to a new position.
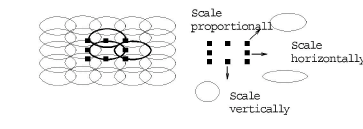
Scale patterns by selecting a guide-pattern and resizing it using the selection handles.
Rotate patterns by clicking the middle guide twice to display the rotation handles. Click a corner handle and drag to rotate.
Skew patterns by clicking the middle guide twice, then dragging the skew handles.
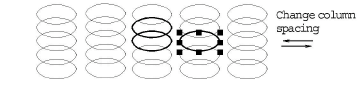
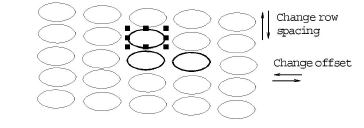
Change row spacing by selecting the top guide and dragging it up or down.
Change row offset by selecting the top guide and dragging it left or right. Changing the offset distorts the rows.
4Press Enter to finish.
The Object Properties dialog re-opens allowing you to apply any other settings. The adjusted size and layout are applied to the selected object and become the current Pattern Fill settings.