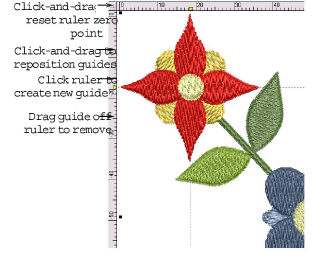
Click View > Show Rulers & Guides to show or hide workspace rulers and guides. Right-click for settings.

Drag the Ruler Zero Point to reset a new ruler zero point.
|
|
Click View > Show Rulers & Guides to show or hide workspace rulers and guides. Right-click for settings. |
|
|
Drag the Ruler Zero Point to reset a new ruler zero point. |
The software allows you to turn rulers on and off and create guides for more accurate digitizing. These make it possible to accurately position and size objects and whole designs. The unit of measurement – mm or inches – defaults to the regional settings in the MS Windows® Control Panel. These, however, can be changed from within the software.
Click the Show Rulers & Guides icon or press Ctrl+R.

Reset the ruler zero point by clicking and dragging the box in the top left-hand corner to the required point in the design.
To create a guide, click on either ruler – horizontal or vertical – and click-and-drag it into position. Multiple guides can be created and just as easily removed.
For more accurate positioning of guides, double-click the yellow handle. In the Guide Position dialog, enter a precise distance from the zero point, and click OK.

To remove a guide, drag the yellow guide handle off the workspace.
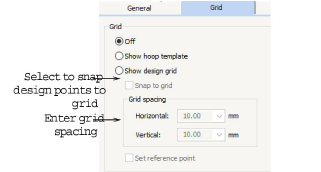
You can turn Snap to Grid and Snap to Guide on or off in the Options dialog.
