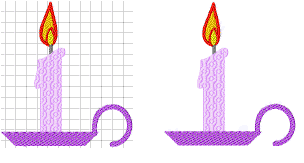
Right-click View > Show Grid to set grid reference point and spacing.

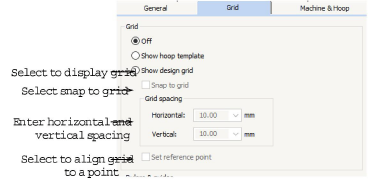
Use General > Options to configure workspace options such as grid, hoop, and scroll settings.
|
|
Right-click View > Show Grid to set grid reference point and spacing. |
|
|
Use General > Options to configure workspace options such as grid, hoop, and scroll settings. |
You can turn the grid on or off, change the grid spacing, or set a reference point. You can also turn Snap to Grid on or off in the Options dialog.

Align the grid with a specific point in the design by setting a reference point – for example, when you want grid lines to intersect the center point of the design, or a horizontal grid line to sit under a particular object.
Use Snap to Grid to align objects in your design to the nearest grid lines. You can align objects to the horizontal (X) or vertical (Y) axis, or both. New reference points will ‘snap’ to the nearest grid line as you digitize. Existing objects will snap to grid when you select and move them.
Right-click the Show Grid icon. The Options > Grid dialog opens.

Select the Show hoop template option to display the current hoop template.
Alternatively, select the Show design grid option to display the grid.
Select the Set reference point checkbox to align a significant point of the design with a grid line or grid point.
For example, you can set the grid reference point to the design center. This is easier and faster than moving the whole design.
Enter Grid spacing values for horizontal and vertical grid lines.
Select the Snap to grid checkbox as preferred.
To temporarily disable Snap to grid as you digitize, hold down Alt.
Click OK. If you selected Set reference point, mark the reference point on your design. The grid aligns so that horizontal and vertical grid lines intersect at this point.