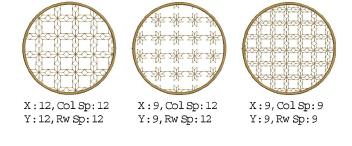
You can insert a pattern fill at its original size and orientation, and then adjust settings later. You can also set the exact size and spacing as you insert the pattern fill. Spacing is the distance between each pattern repetition.
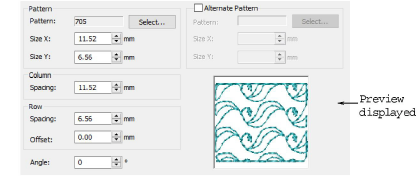
1Double-click or right-click a pattern fill object. The Object Properties > Fill Stitch dialog opens with the current pattern in the preview panel.
2Change the current fill pattern as required.
3Adjust Size X, Size Y, Column Spacing, Row Spacing settings as required.
4Adjust Row Offset as required (from -99.99mm to 99.99mm).

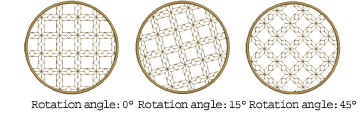
5Adjust Rotation Angle as required (from -180° to +180°). This field sets the current rotation angle of the fill pattern (default is zero), and defines the orientation of the entire pattern fill.
6Click Apply. The digitized object is filled with the selected pattern fill, current settings applying.
If more than half a pattern is outside the boundary, it will be clipped along the boundary.