Auto-digitizing with Magic Wand

InsertArtwork00044.png 

Use General > Insert Artwork to import artwork into current design as a backdrop for manual or automatic digitizing.

ShowBitmapArtwork00045.png 

Use View > Show Bitmap Artwork to show and hide bitmap images.

MagicWand.png 

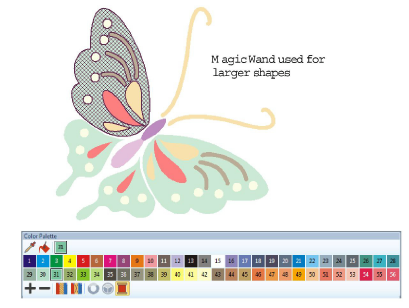
Use Auto-Digitize > Magic Wand to digitize large artwork shapes with weave fill, preserving any holes within.

MagicWandBlockDigitizing.png 

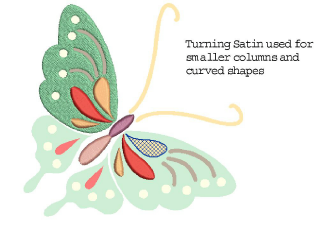
Use Auto-Digitize > Magic Wand Block Digitizing to digitize narrow column artwork shapes with satin stitch.

MagicWandFillWithoutHoles.png 

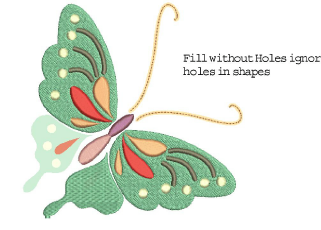
Use Auto-Digitize > Magic Wand Fill without Holes to digitize large artwork shapes with step fill, ignoring any holes within.

MagicWandCenterline.png 

Use Auto-Digitize > Magic Wand Centerline to digitize centerlines in artwork with run stitching.

ColorMatchingMethod.png 

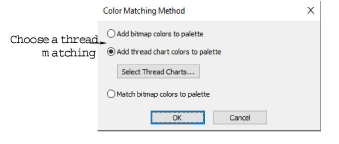
Use Auto-Digitize > Color Matching Method to assign image colors to the color palette, or automatically match them to actual threads.

The Magic Wand tools provide everything necessary to digitize shapes in bitmap images automatically.

To digitize shapes automatically...

1Scan or load the image you want to use.

2Crop and size the image as required.

3Ensure Show Bitmap Artwork is toggled on.

4Use Color Matching Method to assign image colors to the color palette for manual thread matching, or automatically match them to the current color palette or current thread chart.

MatchingMethod.png


5Select Magic Wand.

ArtworkPrep1.png


6Click an area of the image as prompted. The software checks whether it has been processed and displays the Bitmap Artwork Preparation dialog as necessary.

7Hover the mouse pointer over an area of the image, and click. Stitches are generated according to current stitch settings.

MagicWandDigitize-1.png


8Choose Magic Wand tools according to object shape. Turning Satin, for instance, is suited to narrow columns.

MagicWandDigitize-2.png


9Use the Centerline tool to pick out details.

MagicWandDigitize-3.png


10Use the Fill without Holes tool to ignore holes in shapes.

MagicWandDigitize-5.png


11If you want to both fill and outline a shape, using the Magic Wand tool, left-click for fills and right-click for outlines.

12Change thread colors and stitch type as required.

MagicWandDigitize-6.png


13Use the Color Film to place objects in the optimum stitching sequence.

It is easy with Magic Wand tools to double-click and inadvertently create double-layers of stitching. Check everything you do in the Color Film and delete any unnecessary objects.

Related topics...