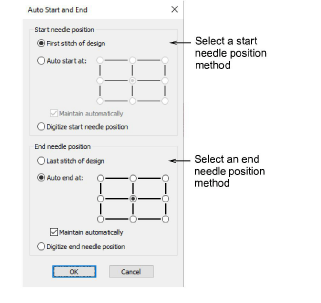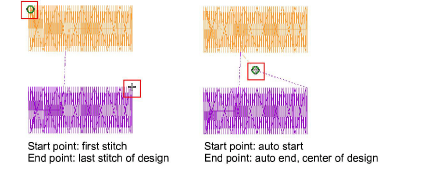
Before stitching, some embroidery machines require you to position the starting needle exactly above the first needle penetration point. Use Auto Start & End to set the positions of first and last stitches in a design.
1Select Design > Auto Start & End.

2Select a Start Needle Position method:
|
Method |
Notes |
|
First stitch of design |
The start point is set to the first stitch in the design. |
|
Auto start at |
The end point is automatically maintained at the specified point in the design. Choose from the available options, |
|
Digitize start needle position |
You are prompted to manually mark the start point. |
3Select an End Needle Position method. The same options apply.
4If you choose to digitize start and end points, you will be prompted once you close the dialog.

5Select the Maintain Automatically checkbox (the default) to automatically maintain start and/or end needle positions. This ensures that start/end points are maintained during any editing operations.
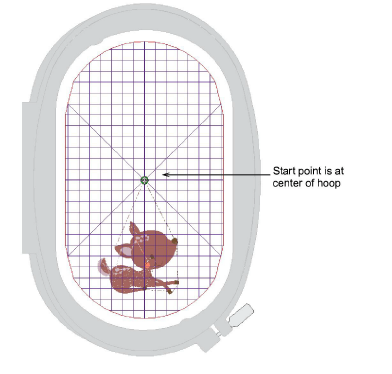
Turn off Maintain Automatically if you want to position the design anywhere within the hoop. You might do this to set up continuous designs or special placements such as on pockets. Use this technique with machines which always start in the center of the hoop. Make sure automatic centering is set to start needle position.

6Click OK. Connecting stitches will be inserted as required before the first and after the last stitches of the design.