
Click Edit > Stitch Edit to place stitch cursor at a selected insertion point.
|
|
Click Edit > Stitch Edit to place stitch cursor at a selected insertion point. |
You can insert stitches in an object to fill gaps. Inserted stitches are considered part of the object rather than independent objects. They will, however, be lost if the object’s stitches are regenerated. Where possible, edit the object properties rather than individual stitches. For example, to increase stitch density, reduce spacing rather than insert stitches.
1Select Edit > Stitch Edit. Alternatively press E.
2Select a needlepoint.
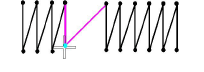
The needle point and stitch colors change and the needle position marker moves to the selected stitch. All stitches after the needle position marker in the stitching sequence appear in black.
3Move the mouse pointer where you want to insert the new stitch, and right-click.
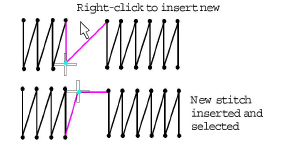
4Move the mouse to where you want to insert the next stitch, and right-click.

5Continue right-clicking as required.
Zoom in and display the needle points for easier selection.