Use Edit > Add Stitch Angles to add stitch angles to closed objects with or without holes. Right-click for settings.

Use Edit > Remove Stitch Angles to remove stitch angles from closed objects with turning stitches.
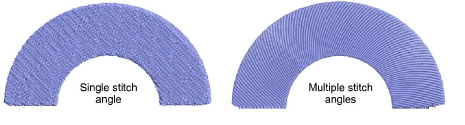
The stitch angles of filled objects are all modified in the same way. Multiple stitch angles can be added or subtracted with the Stitch Angles tools.
In BERNINA V9, the Add Stitch Angles tool can be applied to closed objects with:
turning stitch angles
a single stitch angle, with or without hole(s).
Tip With the Reshape tool, you can add individual reshape nodes, modifying the shape without affecting the stitch angles.
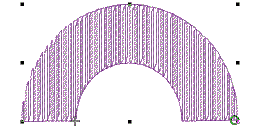
1Select a closed object with or without turning stitches.
If a Stitch Angles tool is applied to an object with a Star Fill or Wave Fill effect, the effect is removed.
2If necessary, click the Remove Stitch Angles tool to return it to the current nominal stitch angle.
3Click the Add Stitch Angles icon. You are prompted to enter stitch angles.

If you press Enter without entering stitch angle lines after the Add Stitch Angles tool is activated, stitch angle line/s are automatically created. You either press Enter again to accept the angle lines or Spacebar to discard them so a single stitch angle is applied.
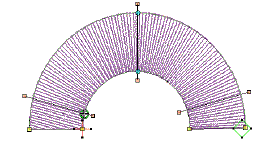
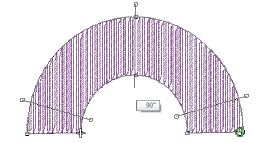
4Digitize stitch angles – Points 1 and 2 – so that they intersect two sides of the object. Make sure that they do not intersect each other.
New stitch lines should not intersect existing stitch lines or an error message displays. Press Backspace to delete.
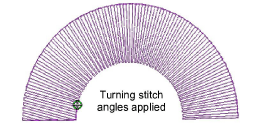
5Enter as many stitch angles as required to create a turning fill effect.
6Press Enter to apply changes, then Esc to finish. The object is re-stitched with the new angles.
Use the Reshape Object tool to adjust reshape nodes as required.