
Use Digitize > Block to digitize columns with turning stitches.
|
|
Use Digitize > Block to digitize columns with turning stitches. |
Use the Block Digitizing tool to digitize columns of varying width and stitch angle. Digitized pairs of reference points define the outline, while lines connecting the pairs define the stitch angles.
1Select a Fill stitch type.
2Click the Block Digitizing icon.
3Digitize the column by marking reference points on alternate sides of the column.
Click to enter corner points.
Right-click to enter curve points.
Mark a pair of points wherever the outline changes, and wherever you want the stitch angle to change.
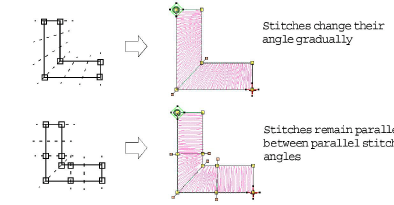
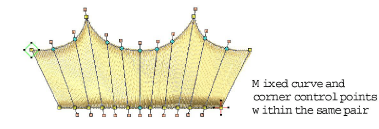
The reshape nodes in a pair do not have to be the same type. For example, one can be a corner point, the other a curve.
If you make a mistake, press Backspace to delete the last reference point, then continue digitizing.
4Press Enter to complete the shape.
5Repeat as many times as necessary to create more objects.
By default, objects are joined by the Closest Join method. If deactivated, all newly digitized objects are joined by the As Digitized method. This means you need to specify entry and exit points, following prompts in the Status Bar.
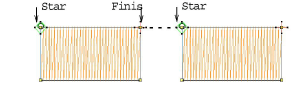
If you are using the As Digitized method, you can choose whether to omit or include the last stitch. For example, if joining two objects, keep or omit the last stitch so that the exit point is close to where you begin the next object.
Press Enter to keep the last stitch and place the exit point at the last reference point you marked.
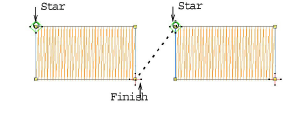
Press Spacebar to omit the last stitch and place the exit point on the opposite the last reference point you marked.
6Press Esc to deselect the tool.