Create stumpwork from existing embroidery
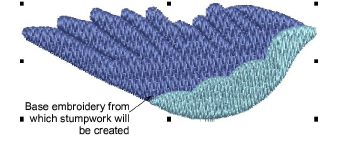
Creating stumpwork from existing embroidery is probably the most common stumpwork scenario. It usually involves a two-step process:
The resulting stumpwork embroidery is usually sewn out separately with wire and border. It is then cut out and sewn or attached to the base design. Required tools are shown above.
Tip Before you begin, you are advised to adjust the piece embroidery setting to ‘wireline’ and uncheck the stablizing run checkboxes. You will be prompted to cut the border immediately after the cutwork border with wireline is added. No internal stabilizing run is added on top of existing embroidery objects.
To create stumpwork from existing embroidery...
1Open an existing design or digitize embroidery objects as required. Add any stitch effects you want.
2Select all objects and click Add CutWork Border to create the stumpwork piece. See Create cutwork borders from existing embroidery for details.
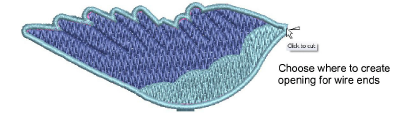
3Once the cutwork piece is created, select it and use the Cut Closed Border tool to leave an opening for wire ends. Assuming the current embroidery type is ‘wireline’, you are prompted to mark a cutting point.
This step is only valid when the current embroidery type is ‘Wireline’ and ‘Piece’ is selected as the border type in the Add CutWork Border docker.
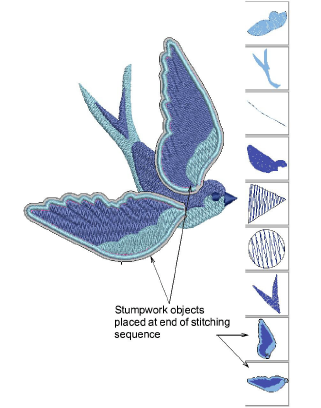
4Select the resulting object group and click Create Stumpwork Sub-design.
Selected objects are bundled into a composite stumpwork object which effectively resides on a separate ‘layer’ to the base design. It can be edited independently by double-clicking or clicking Open Stumpwork Sub-design. See Edit stumpwork sub-design for details.
Tip Study the Stumpwork_Sample2 design included in the designs folder. Try stitching it out to practice the techniques involved. Check your BERNINA machine documentation.