
Use Appliqué > Advanced Appliqué to generate open-object appliqué from one or more source objects.

Use View > Show Appliqué Fabric to show or hide background fabric / color of any appliqué objects in the design.
Several types of ‘primary object’ can be used in the creation of open-object appliqué, including any outline stitch type – Single Run, Satin Outline, etc – any filled object, or any block-digitized object. Additionally, some other objects can be used as input, including lettering objects, auto-appliqués or even other open-object appliqués.
1Create the objects you want to include in the cover stitching of your appliqué design.
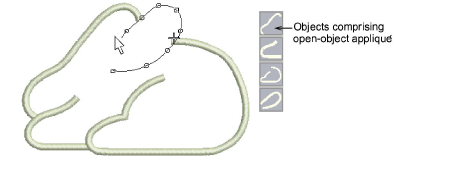
2Set the stitching properties and sewing sequence of these objects.
3Select all objects to be included i n the open-object appliqué and click the Advanced Appliqué tool. BERNINA V9 determines whether the selection is enclosed...

If the area is enclosed, the Appliqué Properties dialog opens.
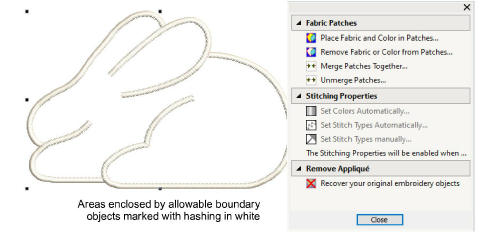
4Use Place Fabric and Color in Patches option to add fabric or color.
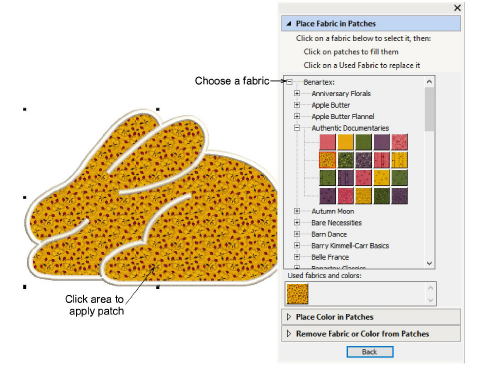
5Select a fabric from the fabrics tree or from the Used Fabrics and Colors palette.
6Move the cursor over the design area. A white outline appears around any enclosed boundary over which the cursor passes.
7Click the enclosed area. The area is filled with the chosen fabric.
8Keep sampling in the same way – either fabric or color patches. Each time you sample, a swatch added to the Used Fabrics and Colors palette.
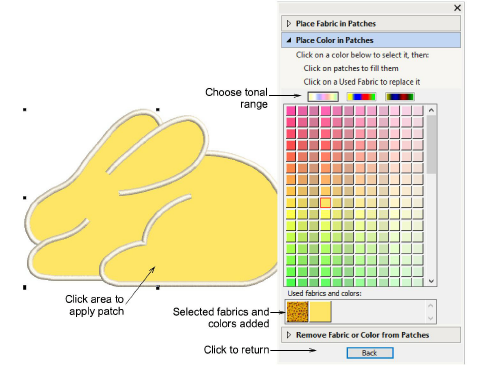
9If you choose too place colors, select a tonal range – Light, Mid or Dark – using one of the three switches at the top of the palette. Then select a color from the palette.
10If your design contains multiple boundaries, select other areas to add more patches.
11Click Back when complete.
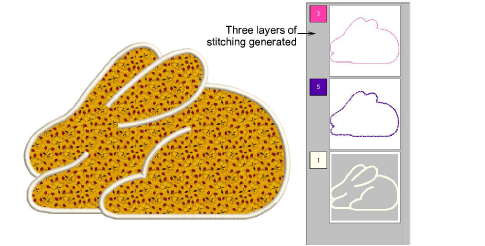
12Click Close to close the Appliqué Properties dialog. Three layers of stitching are generated for the open-object appliqué.
Remember to use the Show Appliqué Fabric toggle to view appliqué fabrics/colors.