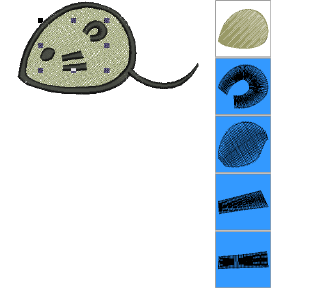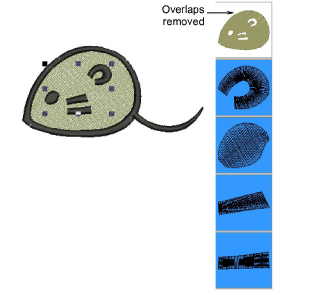
Use Edit > Remove Overlaps to remove unwanted stitching from underlying objects or lettering.
|
|
Use Edit > Remove Overlaps to remove unwanted stitching from underlying objects or lettering. |
Use the Remove Overlaps tool to remove underlying layers of stitching. This helps to reduce the stitch count and prevent a build-up of stitches where they are not needed. A cutting overlap is preserved between ‘cut’ objects and their ‘cutters’ in order to prevent gaps forming. This can be adjusted for different fabric types.

Various embroidery objects can be used as cutters if not too small and with a stitch spacing of 1.00 mm or less. Examples include:
Objects with Satin, Step or Fancy Fill fills
Satin outlines
Auto Appliqué objects with Satin cover stitching
Lettering objects.
‘Cuttable’ objects include:
Filled objects
Auto Appliqué objects
Outline objects.
1Select one or more ‘cutters’.

2Click the Remove Overlaps icon or select Arrange > Remove Overlaps. Stitching overlaps are removed according to the current setting.

Lettering and buttonhole objects cannot be cut in Remove Overlaps operations although they can both be used as cutters.
Stitches underlying see-through fills are not removed. These include fills such as Pattern Fill, Blackwork Fill, Candlewicking Fill, Lacework Fill, Gradient Fill, or stitches with more than 1.00 mm stitch spacing.
Stitches underlying narrow sections of objects are not removed.
Some cuttable outline objects like the satin and zigzag outlines will be converted to fill objects after removing overlaps.
Other cuttable oultine objects will remain outline objects but may become partially inverted depending on their baseline.
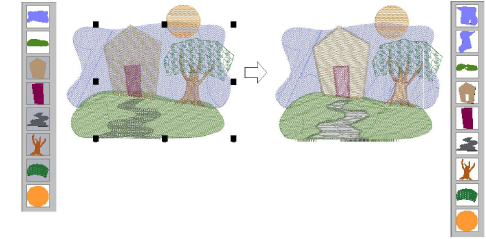
Multiple cutters can be used as part of a single cutting operation:

In the example above, note that:
The sky object has been broken in two.
The door and path have caused the removal of stitches in the house and hill objects.
The tree stem and sky underlying the leaf object are preserved since Pattern Fill is not a valid cutter.
The section of sky where the orange moon overlaps remains unchanged since the moon is not selected at the start of the operation.