Use Lettering / Monogramming > Keyboard Design Collection to toggle Keyboard Design Collection docker display.

Use Edit > Break Apart to split monograms, appliqués, lettering, and blackwork runs into component objects.
Once you have created your keyboard design collection, it’s a good idea to take it through it paces to see how far you can ‘push it’. Depending on how it has been digitized and whether or not the characters are scalable, you should be able to apply most Lettering properties to your embroidery characters. You may also decide that individual letter baseline and spacing settings need further adjustment.
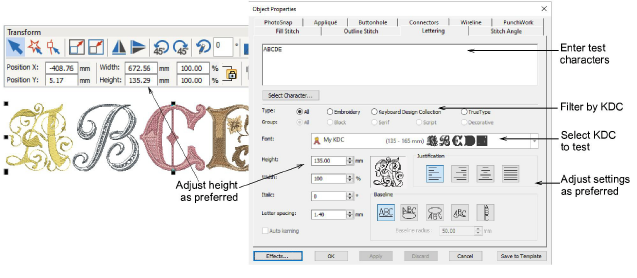
1Click the Lettering tool to open the dialog.
2Select Keyboard Design Collection type to filter the Font list and select the KDC you want to test.
3Enter some characters in the Lettering tab. The Height setting defaults to the reference height.

4Adjust letter height as preferred. The recommended height range appears in the droplist – e.g. ‘135 - 165 mm’. For best results, keep lettering within the recommended range.
5Try modifying the lettering settings such as spacing or slant.

6Try out different baseline or Lettering Art settings.

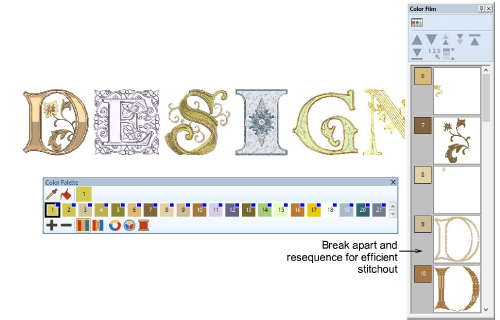
If you are using multi-colored alphabets, try breaking characters apart. Recolor and/or re-sequence for more efficient stitchout.

Because embroidery character designs often involve multiple color changes, you can split lettering apart and resequence for more efficient stitchout.
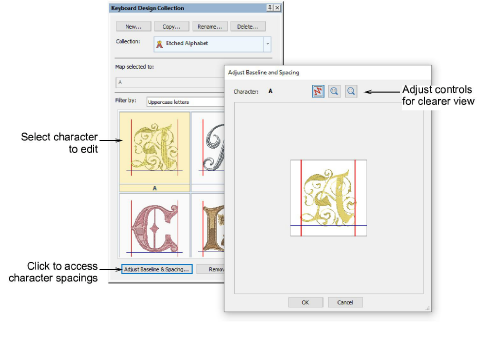
1Select the character you want to adjust, and click the Adjust Baseline & Spacing button.

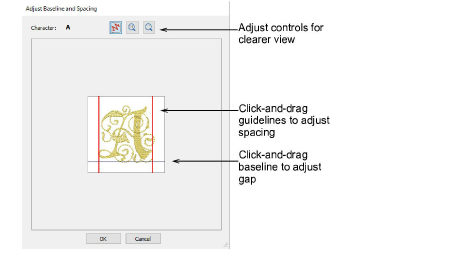
2In the dialog, use the Artistic View and Zoom toggles for a clearer view of the character to be edited.
3Click and drag the vertical guidelines to adjust character spacing on either side.

4Similarly, click and drag the baseline to adjust gap as necessary.