
Use the Rotary Cutting Instructions option to print rotary cutting instructions for your own custom blocks. See also Creating custom patchwork blocks.
Note Not all patches can be rotary cut. Only blocks that are comprised of simple 3- or 4-sided shapes are suitable. Thus some patches may not appear in the rotary cutting instructions.
1Click the Print Preview icon. Print Preview dialog opens.
2Select Rotary Cutting Instructions.
3Click the Options button. The Print Options-Rotary Cutting dialog opens.

4Select print range, either all or a selection.
All: print all blocks.
Selection: print selected blocks only. You must to select the blocks before printing.
5Enter a Seam Allowance.
The outside of the seam allowance is called the cutting line and is not the same as the patch outline or stitching line.
6Select the Print Guide checkbox to print the quilt guide.
The quilt guide includes an outline drawing of the whole quilt, with a number in each element that will be printed in the following pages. The same number appears next to the element when it is printed individually.
Press Next Page and Previous Page to move through all the pages.
7Click OK. The selected block/s displays in the preview window.
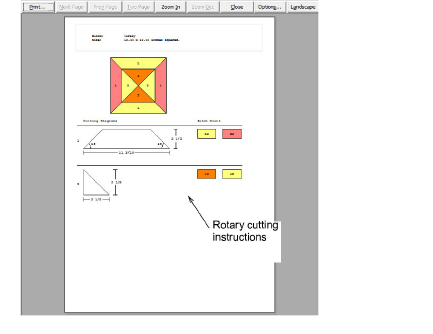
8Click the Print button to print out a copy of the cutting diagrams.