Print patchwork block construction
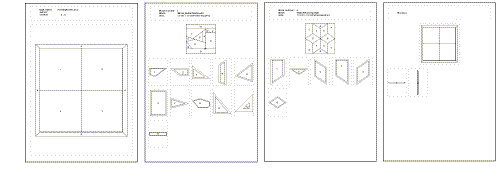
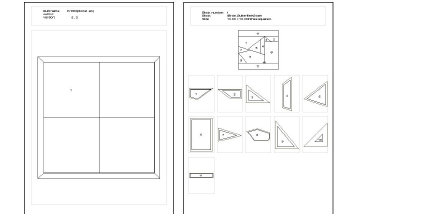
 Block construction includes the individual pieces making up the blocks, sashes, sash squares and border sections. Each piece is printed with a specified seam allowance. The printout is divided into block sections, beginning immediately after the guide is printed. Each section prints everything required for one block. Each block section begins with a block guide printed at one-fifth scale, including key letters identifying the patches in the block. Use this method to print blocks that include appliqué as part of the block.
Tip To print appliqué shapes that were created using the appliqué drawing tools, see Print appliqué shapes
To print patchwork block construction
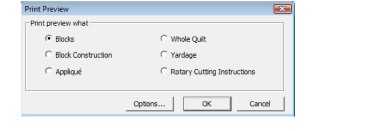
1Click the Print Preview icon. The dialog opens.
2Select Block Construction.
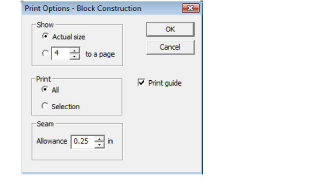
3Click the Options button. The Print Options-Block Construction dialog opens.
4Select to print at actual size or specify the number of blocks per page.
5Select print range, either all or a selection.
Don’t forget to select the blocks before printing.
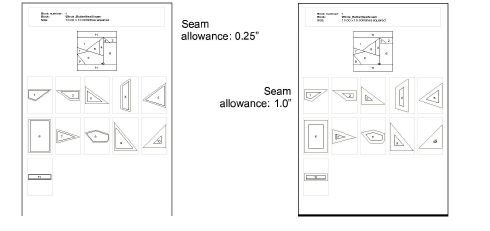
6Enter a Seam Allowance.
The outside of the seam allowance is called the cutting line and is not the same as the patch outline or stitching line.
7Select the Print Guide checkbox for the first page to be an outline drawing of the whole quilt, with a number in each element that will be printed in the following pages. The same number appears next to the element when it is printed individually.
Press Next Page and Previous Page to move through all the pages.
8Click Print.