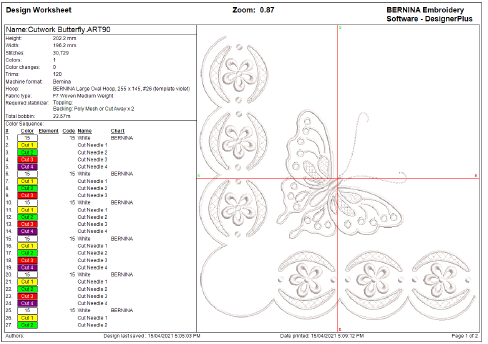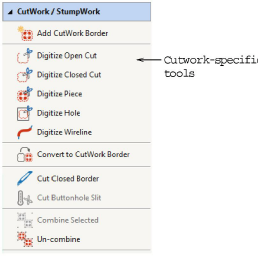
The cutwork interface has three main components – a toolbox, a docker, and object properties. In addition, the design worksheet and color list in the Color Film docker contain cutting information corresponding to position markers on the CutWork tool.
The toolbox contains all tools needed to digitize cutwork or stumpwork pieces from scratch or create from existing embroidery.

Cutwork-specific tools include:
The Add CutWork Border tool allows you to create cutwork pieces and holes from existing objects. This is generally used for stumpwork.
The Digitize tools allow you to create cutwork objects – holes or pieces – with up to five layers of embroidery and cutting components, including stabilizing runs, tackdown runs, cuts, embroidery, and net fills.
The Convert to CutWork Border tool allows you to convert selected objects to cutwork borders.
When you select multiple cutwork objects, the Combine Selected tool becomes available. Use it to combine cutting lines. Cutting is optimized so that the four cutting tool positions are only employed once per design.
Other tools:
Stumpwork involves the creation of cutwork pieces and then their transformation into stumpwork sub-designs. For details of stumpwork tools, see Stumpwork concepts.
The Cut Buttonhole Slit tool allows you to insert preset buttonholes and merge them into a design. See Buttonholing for details.
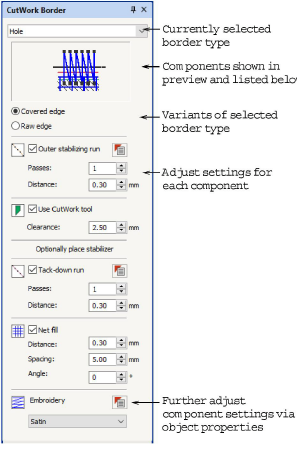
The CutWork Border docker allows you to preset options for both cutwork and stumpwork.
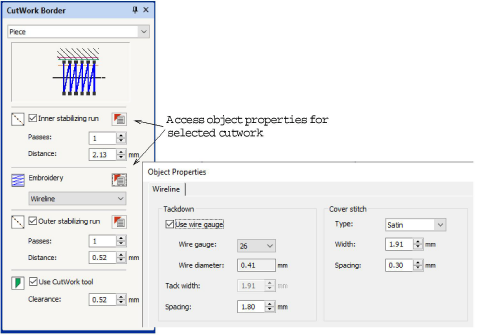
Each component of a cutwork object has its own object properties. For example, wireline properties can be adjusted via a dedicated Wireline tab in the associated Object Properties.
In addition to information about color blocks, embroidery objects, and object sequence, the Color Film docker also displays cutting lines used in cutwork designs. Color-coded icons represent the four different cutting angles available with the CutWork tool and their order on the machine.
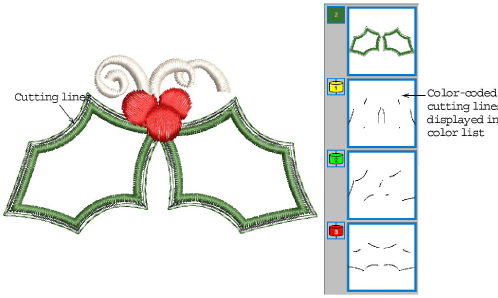
In addition to thread information, the design worksheet also contains information about cutting angles and their order on the machine. They are listed as ‘Cut Needle 1’, ‘Cut Needle 2’, etc, and correspond to position markers on the CutWork tool.
