For all newly created open-object appliqué, secondary objects are created using automatic stitch colors. You can assign special colors for each layer or simply match colors to cover stitching. You have two options when it comes to setting stitch types to use for secondary objects – automatic or manual.
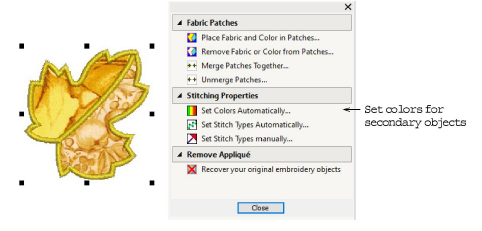
1Double-click the open-appliqué object. The Appliqué Properties dialog opens.
2Select the Set Colors Automatically option. The Automatic Stitch Colors dialog opens.
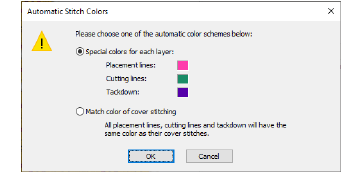
3Choose an automatic color scheme from the available options:
Special colors for each layer: If selected, all secondary objects are shown and stitched in default colors (chosen for visual clarity). These can be modified via stitch type settings.
Match color of cover stitching: If selected, all secondary objects take the color of the cover stitching.
1Double-click the open-appliqué object if not already open. The Appliqué Properties dialog opens.
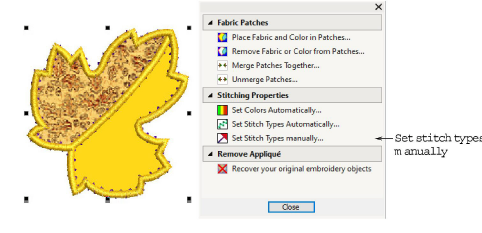
2If you are happy for the software to assign stitch types for secondary objects, click the ‘Set stitch types automatically’ option. Stitch types for all tackdowns are set according to the cover stitch type as follows:
If using Satin, Step, or Fancy, tackdown is set to Zigzag.
If anything else, tackdown is set to Run stitch.
3If you require greater control over stitch types used for placement lines, cutting lines, and tackdowns, select the ‘Set stitch types manually’ option. The Set Properties Manually panel is displayed.
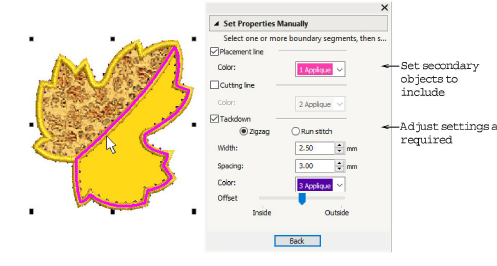
4Select the secondary objects you want included in your open-object appliqué:
Place the cursor over an individual boundary segment and click the mouse.
Hold down the Ctrl key while selecting to add highlighted sections to the selection. Or, if already selected, subtracted from the selection.
The selected boundary segments appear in magenta and the controls are activated.
5Set the display color for each of the secondary objects – placement lines, cutting lines, and/or tackdown – you have selected.
When you set colors manually, any change you make overrides automatically chosen colors.
6If you have chosen to include tackdown stitches, select the required type:

Zigzag: This gives you control over:
Width: Set column width for zigzag stitch.
Spacing: Set stitch spacing.
Color: Set stitch color.
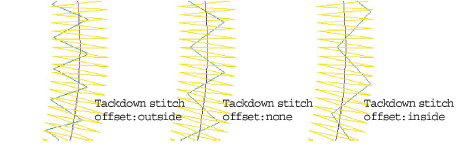
Offset: Set cover stitching offset as shown:
Run Stitch: This gives you control over:
Stitch length: Set stitch length to suit the shape – where an object has tight curves, select a shorter stitch length. To reduce the stitch count for flatter curves, increase stitch length.
Color: Set stitch color.
7Click Back to return.