Use Edit > Weld to merge selected overlapping objects into a single 'flattened' object.
|
|
Use Edit > Weld to merge selected overlapping objects into a single 'flattened' object. |
Digitizers often want to combine or ‘weld’ objects into a single object. Also when opening stitch files which have been broken into multiple objects, you sometimes want to merge these back together. The technique can also help with auto-digitized designs. Simply select the objects you want to merge, and click the Weld button.
The welding operation can be applied to diverse fill types. The properties of the topmost object generally apply to all. However, some results may not be quite what you expect...
|
Source |
Result |
Note |
|
|
|
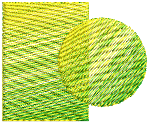
Here we combine a Step fill with Color Blending. The result takes the color of one of the color blend layers. It has also Gradient Fill applying. |
|
|
|
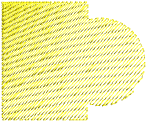
Where both source objects have Color Blending applying, we obtain the same result as the above. |
|
|
|
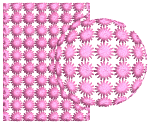
An interesting result is obtained by combining Step fill with 3D Globe effect. Here the resulting object takes the color and motif fill of the topmost layer but the 3D effect continues to apply only to the original object. Turn off the effect to achieve a unified motif fill. |
|
|
|
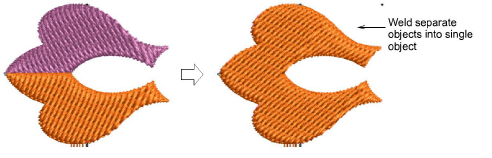
Another interesting result is achieved by combining a satin outline with step fills. The ‘hole’ is preserved but Satin becomes Step fill. The welded object inherits the turning stitching of the outline. |