o
o
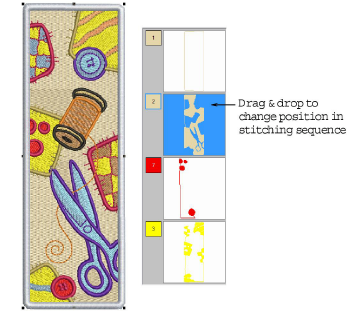
Click General > Color Film to open the Color Film. Resequence by dragging and dropping objects in the list.

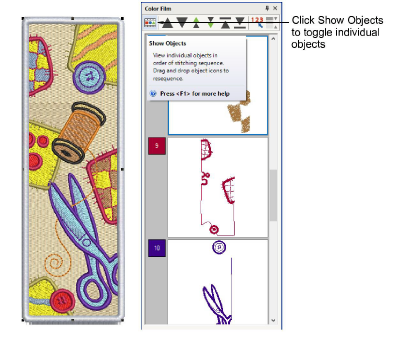
Click Color Film > Show Objects to view individual objects in order of stitching sequence. Drag and drop object icons to resequence.
Designs are made up of individual embroidery ‘objects’ grouped by ‘color block’. These are listed in stitch order in the Color Film. Use it to optimize your design by resequencing selected color or objects. Generally, you aim to keep objects of the same color together in order to minimize color changes, trims, and frame movements. Fills are always stitched first, details, including borders or small areas, last.
Note There are instances where colors have to be split, particularly where the same color is used for fills and details.
1Click the Color Film icon on the General toolbar.
The Color Film dialog opens displaying all color blocks in the design in order of stitching sequence.

2Drag and drop color blocks to change their position in the stitching sequence.
The Color Film is synchronized with the workspace and vice versa. It dynamically updates whenever you select, modify or delete objects, or create new ones.
3Click the Show Objects toggle to view individual objects. All objects within each color block are displayed in their stitching order.
4Use the list to drag and drop object icons and resequence as required.
To select a range, hold down Shift as you click.
To select multiple items, hold down Ctrl as you click.
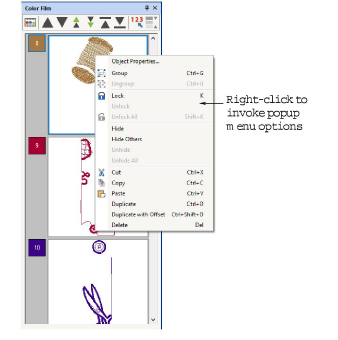
5Right-click any object in the list to invoke the popup menu. Use it to cut, copy, paste, or delete objects as required.
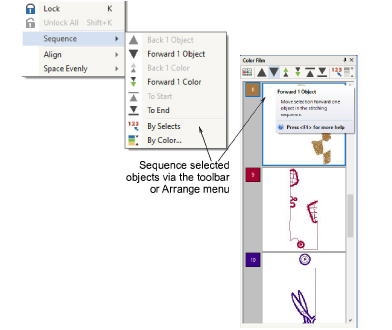
6Use the Sequence command buttons to reposition selected color blocks or individual objects in the stitching sequence.