Create keyboard design collections
The Keyboard Design Collection feature allows you to map existing embroidery character designs to keyboard characters so they can be added and edited easily in BERNINA V9. There are three ways to do this. But first you must create a custom KDC to store your characters.
To create a keyboard design collection...
1Access Artwork Canvas or Embroidery Library.
The Keyboard Design Collection feature provides a number of purpose-made embroidery character design collections. These are located as dedicated sub-folders within the Alphabets & Monograms folder of your BERNINA embroidery samples.
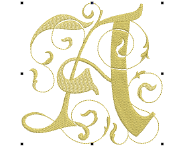
2Select or open a character on which to base your collection reference height. Choose an ‘M’ or other capital letter.
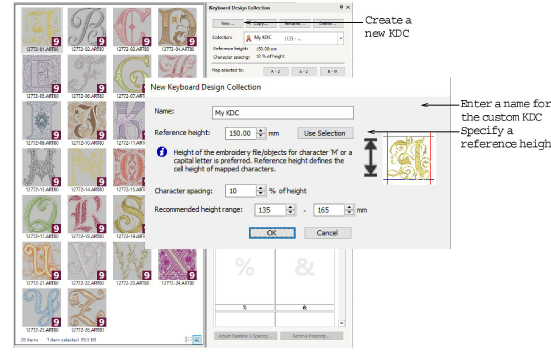
3Open the Keyboard Design Collection docker and click the New button.
4Enter a name for your collection and specify a reference height. The best way to do this is to click the Use Selection button. This will read the digitized height of the selected character directly into the field. Round off as necessary – e.g. ‘150 mm’.
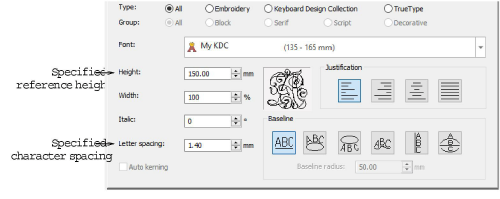
The reference height does not resize designs while mapping. It is meant as a reference when sizing lettering and becomes the default letter height in the Object Properties > Lettering dialog.
5Optionally, adjust character spacing. This is specified as a percentage of height. It may vary with the style of source characters. Again, this value can be overridden in the Object Properties > Lettering dialog when using the character design font.
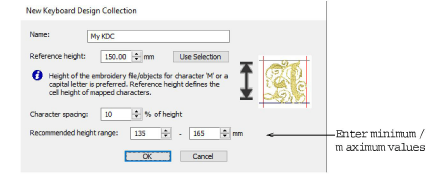
6Optionally, enter a recommended height range. Scalability depends on the quality of the original characters. Rules of thumb:
-
Grade A designs: ±20%
-
Grade B, C, D: ±10%
For example, a Grade B font with a reference height of 150mm might have a recommended size range of 135mm to 165mm.
The values you enter here are indicative only. They are displayed in the collection list of the Keyboard Design Collection docker as well as the font list of the Object Properties > Lettering dialog.
7Click OK to complete.
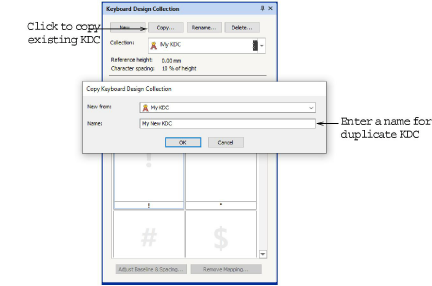
8Use the buttons at the top to manage your collections – copy, rename, or delete. The Copy option can be useful if you want to base a new collection on an old one.
To map characters from the design workspace...
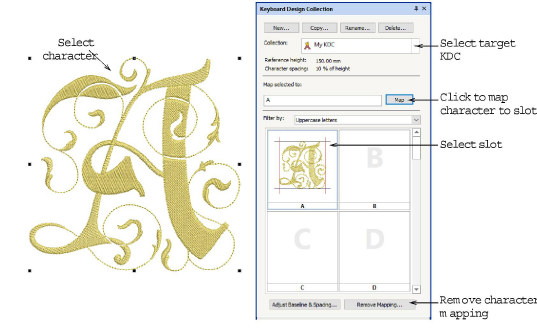
1Open the Keyboard Design Collection docker and select the target KDC from the Collection droplist.
2Open the character you want to add, and size and edit as necessary.
3Optionally, filter the character set using the Filter by droplist.
4Select the character, select the corresponding slot – e.g. ‘A’ – and click Map. The character is added to the design collection.
If you make a mistake assigning a character, use the Remove Mapping button to clear the slot and start again.
Original design colors and size will be maintained while mapping. Baseline and spacing reference lines can be adjusted via the Adjust Baseline & Spacing button. Height can be later adjusted in the Object Properties docker.
To map characters in the design library...
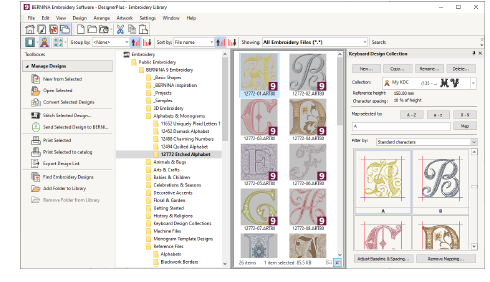
1Open the Design Library via Manage Designs.
2Locate the folder containing the embroidery character designs you want to use.
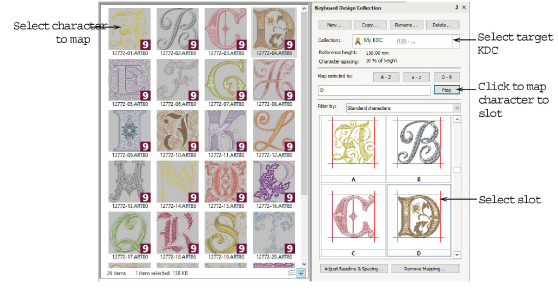
3Open the Keyboard Design Collection docker and select the target KDC from the Collection droplist.
4Select the character, select the corresponding slot, and click Map. The character is added to the design collection.
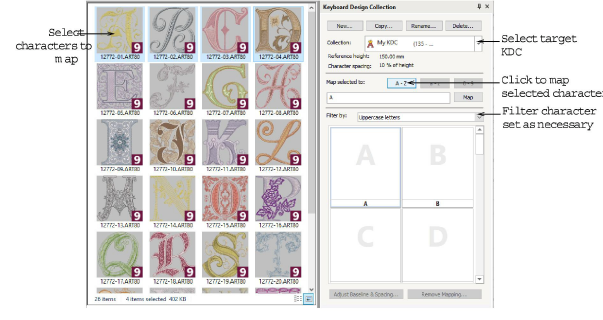
To map a batch of characters...
1Open the Design Library via Manage Designs.
2Locate the folder containing the embroidery character designs you want to use.
3Open the Keyboard Design Collection docker and select the target KDC from the Collection droplist.
4Filter the character set using the Filter by droplist.
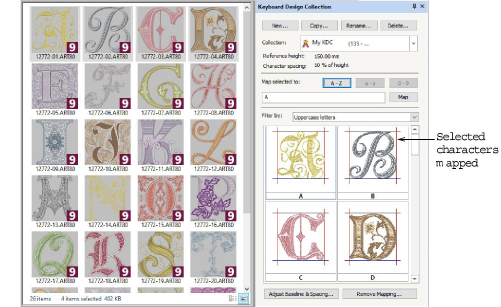
5Select the characters to map. Holding down the Ctrl key, click each letter you want to assign to the collection.
6Click the relevant batch mapping button – A-Z, a-z, or 0-9. The characters are added to their corresponding slots in the design collection.
The design files need to be named consistently so they can be sorted in ascending or descending order. For example, ‘A, B, C, D’ and ‘a, b, c, d’, etc.


