The Add Border dialog offers a list of predefined border shapes. You can also create your own to add to the library. These can be saved to the default ‘Borders’ set or one of your own creation. The object used to create a custom border can be a filled closed shape, or a closed shape with a single run outline. The custom border will use satin outline by default. This can be changed once the border is selected in the Monogramming dialog.
Tip Like borders, you can create your own ornament patterns for use in monograms using the Create Pattern tool.
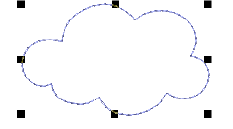
1Select the closed embroidery object you want to save as a border.
2Select Settings > Create Border. The Create Border dialog opens.
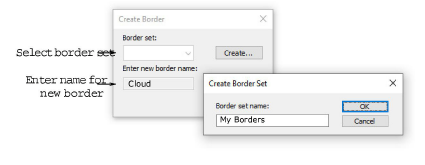
3Select a border set from the list. Or click Create to define a new border set. Enter a name and click OK.
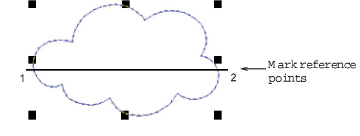
4Enter a name for your new border and click OK. You are prompted to digitize the start and end points of the border.
5Click to mark two reference points on the border. Reference points set the standard orientation of the border.
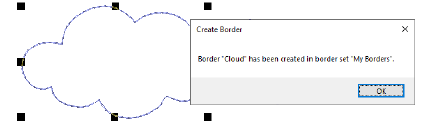
6Click OK. The new border is saved to the border set and a confirmation message displayed.
The new border is now available for use with your monogram designs.
