Use Stitches > Blanket Outline for narrow, open borders with a ‘comb’ effect.

Use Stitches > Zigzag Outline for narrow, open borders with a ‘zigzag’ effect.
|
|
Use Stitches > Blanket Outline for narrow, open borders with a ‘comb’ effect. |
|
|
Use Stitches > Zigzag Outline for narrow, open borders with a ‘zigzag’ effect. |
Blanket and zigzag stitches are used to create narrow, open borders with a ‘comb’ or ‘zigzag’ effect. They are generally used for practical applications, such as borders around appliqué. They can also be used for decorative effect.

You can adjust stitch width and spacing.

Select blanket or zigzag from the Stitch toolbar.
Select a digitizing tool and digitize a shape, open or closed.
When an open shape is digitized left-to-right, blanket stitch is oriented downwards. Otherwise, it is oriented upwards.

To adjust spacing and width, double-click or right-click the object.
The Object Properties > Outline Stitch tab opens. The spacing and width controls are similar for both stitch types.

Adjust the spacing field as necessary. This value is the distance in millimeters between each stitch.

Adjust the width field as necessary. This value controls the thickness of the border or outline.

Adjust blanket orientation as necessary.

With blanket, stitches are positioned by default around the center of a digitized line. You can, however, offset them to one side, depending on where you want the border to sit in relation to the enclosed object/s.

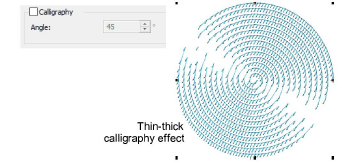
Like satin outline, the blanket and zigzag stitch Calligraphy setting can be used to create thin-thick effects.
