
Use Stitches > Satin Fill to create stitch fills for narrow shapes.

Use Stitches > Raised Satin Fill to create raised surfaces – can be applied to lettering or used with trapunto for quilting effects.
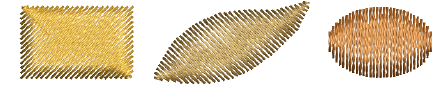
Use Satin Fill when creating narrow shapes of varying width. Change the stitch density in satin fills at any stage.
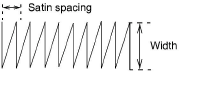
Where a shape is narrow, stitches need to be less dense because too many needle penetrations can damage the fabric. The larger the spacing, the lower the density.
Tip Use Raised Satin Fill to create raised embroidery designs consisting of multiple layers of satin stitching.
Select Satin Fill from the Stitch toolbar and digitize a closed shape.
Double-click or right-click a satin fill object to adjust settings. The Object Properties > Fill Stitch > Satin dialog opens.
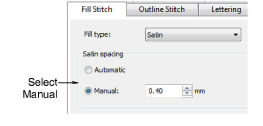
Optionally, select the Manual option. The spacing field is activated.
To increase stitch density, enter a smaller value.
For more open stitching, enter a larger value.

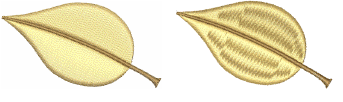
To apply automatic spacing, select the Automatic, checkbox. Auto spacing automatically adjusts the stitch spacing wherever a column changes width.
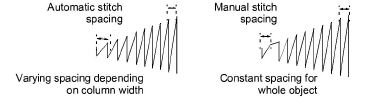
With automatic spacing off, stitch spacing, and therefore density, will be uniform. In many shapes, this provides a nicer looking fill. It may also prevent thread breaks on tight curves.
With automatic spacing on, spacing is adjusted according to column width. It is best used with objects employing turning satin with multiple angles.
Automatic spacing works best with Block, Closed Freehand, Open Freehand, and Open Object, with Satin as the selected stitch type.
It doesn’t work with objects employing a single stitch angle – e.g Closed Object with Satin as the selected fill stitch. The Automatic option will be unavailable in Object Properties.
If you add stitch angles to the object, the Automatic option becomes available.