
Use General > Object Properties to adjust pull compensation settings.
|
|
Use General > Object Properties to adjust pull compensation settings. |
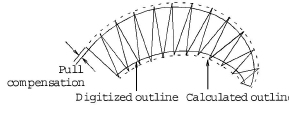
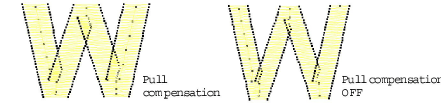
Embroidery stitches pull fabric inwards where the needle penetrates. This can cause fabric to pucker and gaps to appear in the embroidery. Shapes are slightly narrower and longer in the final embroidery than they look on the screen. Pull compensation counters this effect by ‘overstitching’ outlines of filled shapes on the sides where the needle penetrates. Apply automatic pull compensation to objects in your design, either before or after digitizing.
The amount pull compensation required depends on the stitchout fabric. Experiment with the fabrics you are going to use and see if the set amount is suitable before changing it. You can also adjust pull compensation to suit the fabric you are embroidering on by selecting Settings > Fabric Settings.
Tip Applying underlay stitching, and using appropriate backing and topping when stitching out, can also reduce pull effect.
1Select an object or objects to adjust their particular settings.
2Click the Object Properties icon. The Object Properties dialog opens.
3Click the Effects button and select the Others tab.
4Select the Pull Compensation checkbox.

5Click Apply. New or selected objects use the new settings.
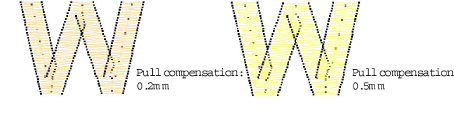
Pull compensation is automatically set at 0.2 mm. This is suitable for most designs. However, 0.4 mm is recommended for use with automatic digitizing.
6Enter an overstitch allowance (in mm) as required.
7Click Apply. New or selected objects use the adjusted settings.
Click Save to Template before closing this dialog to save settings permanently. Saved settings will be applied to all new designs based on the current template.