
Use General > Morphing to create transformed object outlines and stitches.
|
|
Use General > Morphing to create transformed object outlines and stitches. |
The Morphing feature allows you to transform object outlines and stitches in novel and interesting ways. They are additive in the sense that more than one effect can be applied to a given selection.
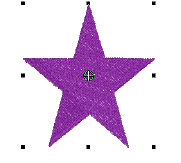
1Select one or more objects. Any object/s can have morphing effects applied.
2Click the Morphing icon on the General toolbar. The Morphing Effect docker opens with all morphing effect buttons enabled.
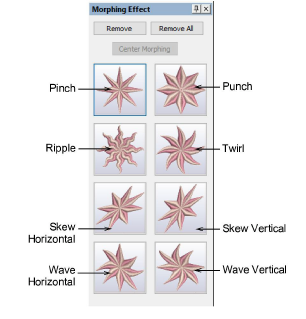
3Choose a morphing effect:
|
|
Use Pinch to pinch the object outlines and stitches together in the morphing center, while pulling outer stitches away from each other. |
|
|
Use Punch to punch the object outlines and stitches away from the morphing center, while stretching the object outlines and stitches around an imaginary sphere. |
|
|
Use Ripple to apply a wave pattern radiating from the morphing center, like dropping a stone into a pond. |
|
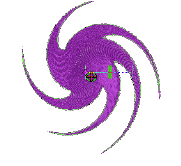
|
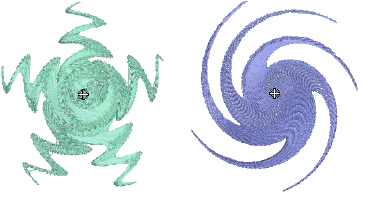
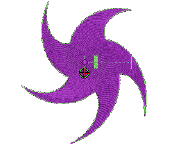
Use Twirl to twist the object outlines and stitches around the morphing center, creating a swirling effect like a whirlpool. |
|
|
Use Skew Horizontal to slant the object outlines and stitches horizontally to the left or right. |
|
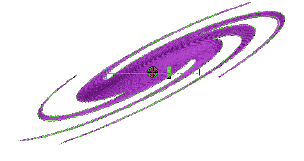
|
Use Skew Vertical to slant the object outlines and stitches vertically up or down. |
|
|
Use Wave Horizontal to move the object outlines and stitches to follow a horizontal wave pattern |
|
|
Use Wave Vertical to move the object outlines and stitches to follow a vertical wave pattern. |
The selected morphing effect is applied to the current selection with the morphing center (if any) defaulting to the center of the current selection.
BERNINA V9 also does the following:
Groups selected objects if they were not already grouped.
Applies the morphing effect to selected objects as a whole, using the default morphing center and current parameters.
Activates the Reshape Object tool for the resultant objects.
Displays the available morphing graphical controls for the selected morphing effect.
4Optionally, click the Undo button to undo the morphing transformation, or click and drag the available morphing controls to adjust the effect.
If you drag one of sliders, the resultant object outlines display dynamically in black until the mouse button is released.
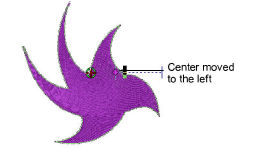
5Optionally, if available, adjust the morphing center using the Reshape Object tool. (Not all morphing effects have a moveable center.)
The Center Morphing button in the Morphing Effect docker is enabled when the morphing center is moved away from the center of the current selection. Clicking it causes the morphing center to be moved back to the center of the current selection.
6Apply as many effects to the current selection as desired.
7Optionally, remove one or more morphing effect/s by the following means:
The Remove button is enabled if the current selection has one or more morphing effects applying. Clicking it causes the last-applied morphing effect to be deleted. The previous morphing effect (if any) becomes immediately available for reshape or removal.
Clicking the enabled Remove All button causes all morphing effects to be removed from the current selection and the Reshape process to be stopped.
Morphing is a powerful feature but don’t overdo it. Keep in mind the following points when morphing objects/designs:
To avoid poor quality embroidery, don’t use too much of the effect. Less is more when it comes to morphing.
Use larger stitch spacing – increase it by about 20%.
Avoid morphing Satin stitches – in some objects they become too long.
Increase the underlay margin to avoid it projecting outside the cover stitch.


