
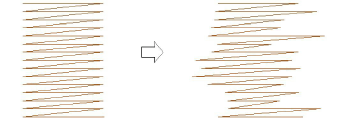
Use Effects > Textured Edge to create rough edges and shading effects, or imitate fluffy textures.
|
|
Use Effects > Textured Edge to create rough edges and shading effects, or imitate fluffy textures. |
Use Textured Edge to add rough edges to objects, create shading effects, or imitate fur or other fluffy textures in your design. Textured Edge is applied based on current settings in the Effects dialog. Adjust settings to change the degree of roughness, the side of the object to which the effect is applied and the textured edge margin. You can change these settings before or after digitizing.
1Click the Textured Edge icon. The effect will be applied to new or selected objects based on current settings.
2Create closed-object/s – circle or square – and select. The current settings are applied to the selected object.
3To change settings, right-click the Textured Edge icon with the object selected. The Effects > Textured Edge dialog opens.
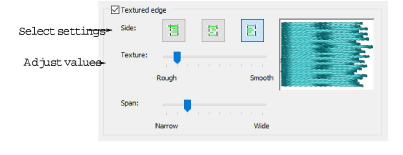
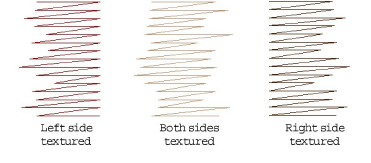
4Use the buttons to choose the side of the object you want to apply the effect to.
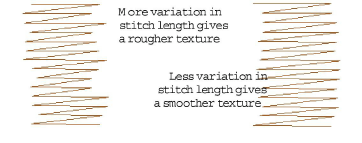
5Use the Texture slider to select the degree of texture – left for a rougher texture and right for a smoother texture.
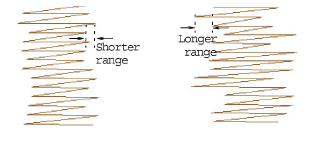
6Use the Span slider to select a stitch range in which you want the stitches to fall. Move the slider to the left for a short range and to the right for a longer range.
7Click Apply to preview the effect or OK to finish and close. The stitch is regenerated with the adjusted settings.
To better view the Textured Edge effect, press the . key to display needle points or use Artistic View.