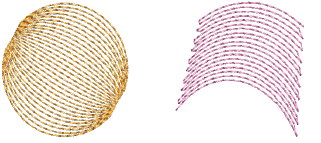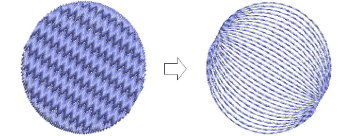
Use Stitches > Contour Fill to create stitching which follows object contours, creating a curved, light-and-shade effect.
|
|
Use Stitches > Contour Fill to create stitching which follows object contours, creating a curved, light-and-shade effect. |
Contour stitch provides back and forth stitching with a fixed number of lines with variable spacing depending on the object outline. It can only be applied to block digitizing objects, including Circle objects. Closed objects modified with the Add Stitch Angles tool cannot be used with Contour stitch.

1Click the Contour Fill icon. The stitch type will be applied to new or selected objects based on current settings.
2Create a block digitizing object and select. The current Contour settings are applied to the selected object.

Stitch angle has no effect on the pattern layout.
3To change settings, double-click or right-click the object. The Object Properties > Fill Stitch dialog opens.

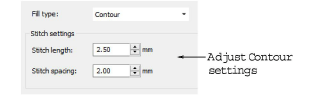
4Adjust contour Stitch Values as desired:
Adjust Stitch length for smoother or sharper curves.

Adjust Stitch spacing for denser or more open stitching.

5Click Apply to preview the effect or OK to finish and close. The selected settings are applied to the object.