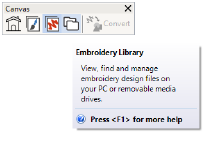
The Embroidery Library is accessed from the Canvas toolbar.

It has five components‚ two toolbars, a toolbox, a navigation tree, a design display area, and an info panel as summarized here...
|
Component |
Function |
|
Manage Designs toolbox |
Use the toolbox on the left to open selected designs, convert them, print them, or output them to any connected embroidery machine or data media, or find folders containing the designs and add/remove folders to/from embroidery library. |
|
Navigation tree |
The navigation tree in the Embroidery Library is not an exact duplicate of your Windows Explorer folder structure. Because the library only deals with embroidery designs, you will only see folders which have already been added to the library. |
|
Design display |
The design display area shows any designs in selected folders corresponding to the filter selected and search criteria entered in the Manage Designs toolbar.
|
|
Design info |
When a design is selected, summary information is displayed in the info panel. |
|
Manage Designs toolbar |
Search or sort the entire embroidery library or any chosen folders on any criteria selected. See below. |
|
Standard toolbar |
Create new designs, open existing designs, open recent designs, and cut, copy and paste selected designs. |
Note There are differences in the way the info panel is displayed in different versions of Windows OS. Your display may differ slightly from the screen images shown here.